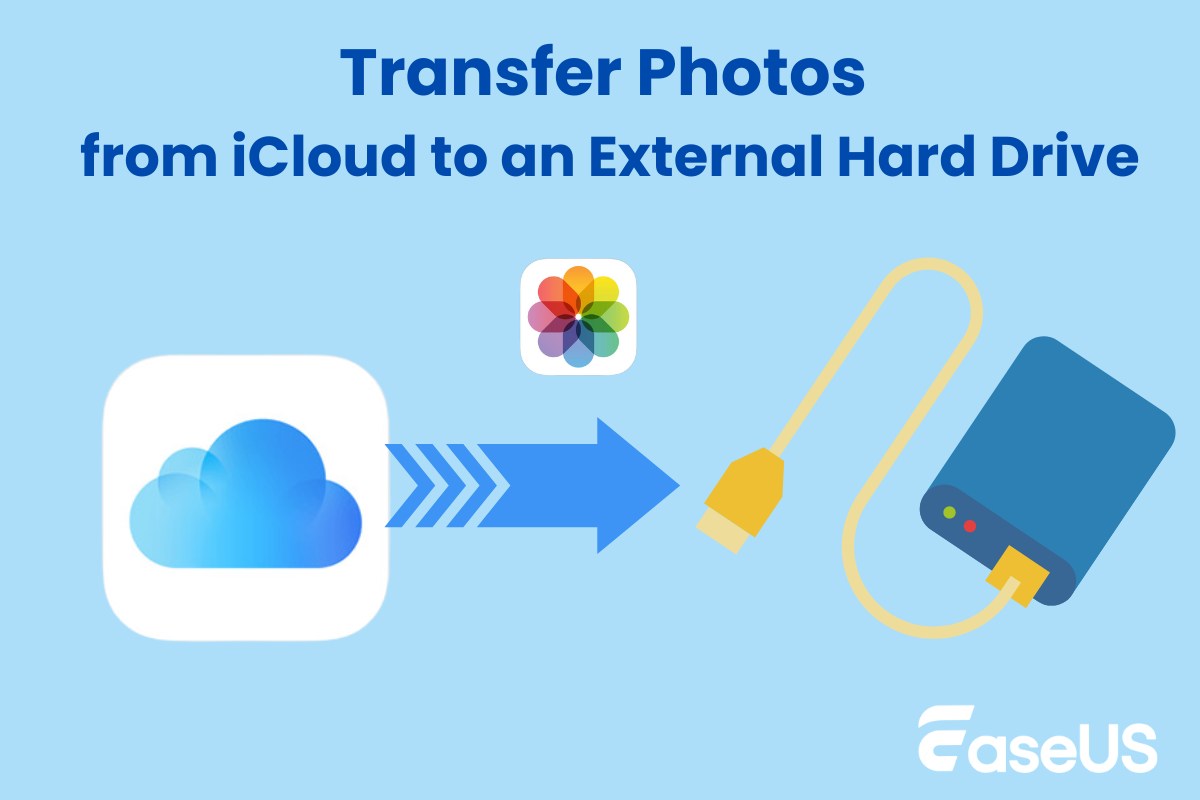
How to Transfer Photos from iCloud to an External Hard Drive
Quick Summary: What's the Fastest Way to Transfer iCloud Photos to an External Device?
Transferring iCloud photos to an external device sounds a bit complicated. The fastest way to transfer iCloud photos to an external hard drive is by using a reliable iPhone transfer tool. EaseUS MobiMover performs well when exporting iCloud photos. It helps transfer all photos from iCloud to an external device directly. The steps are easy.
Step 1. Connect the external hard drive to your computer.
Step 2. Sign in with your iCloud account.
Step 3. Select the photos you want to transfer.
Step 4. Click a Transfer button.
iCloud is a common storage service that saves and backs up photos. If you save many photos on iCloud, these photos will take up much space. You can transfer iCloud photos to an external drive to free up iCloud storage. Backing up iCloud images to an external hard drive helps avoid data loss. You can also access photos offline on an external hard drive.
This guide will walk through four practical ways to transfer iCloud photos to an external hard drive. Whether you use Windows or Mac, you can easily transfer your iCloud photos to a hard drive.
How to Transfer Photos from iCloud to External Hard Drive with iPhone Transfer tool
Compatibility: Windows and Mac
Best for: Export all photos from iCloud in one click or selectively transfer
External hard drives are ideal for backing up photos. If you are seeking a direct and easy way to transfer iCloud photos to an external hard drive, like SSD or HDD, don't miss EaseUS MobiMove. EaseUS MobiMover is a versatile tool that helps manage, transfer, and back up your iPhone data. With it, you can transfer iPhone photos to an external hard drive. MobiMover is also an excellent iCloud manager for viewing, importing, and exporting iCloud data. You can directly transfer photos from iCloud to an external hard drive on Windows or Mac. It helps transfer all iCloud photos in one click or individual iCloud photos.
EaseUS MobiMover provides excellent features for transferring iCloud photos.
- Directly download iCloud photos to a hard drive without processing them.
- Export more than 1000 photos from iCloud at a time.
- Support accurate connection between external hard drive and computer.
- Offer other practical features like viewing the transferred files.
To enjoy high-speed photo transfer from iCloud, follow the steps:
Step 1. Download EaseUS MobiMover on your computer and launch it. Connect the external hard drive to your computer using a USB cable.
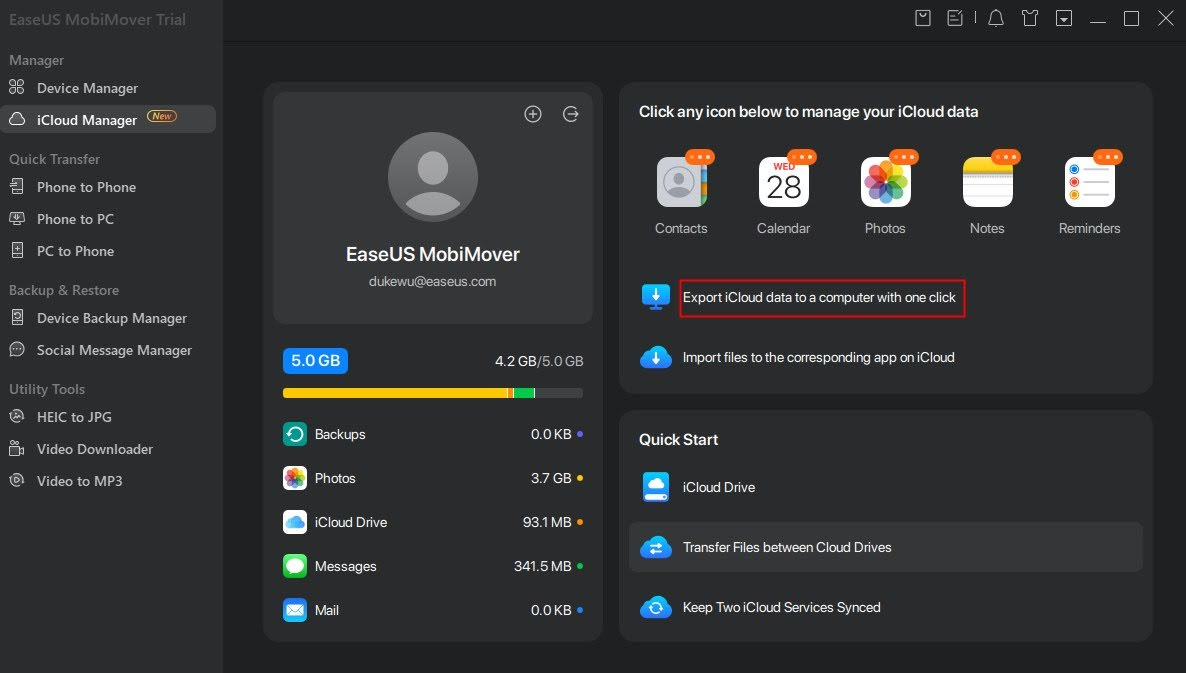
Step 2. Click the "iCloud Manager" Mode. Sign in with your Apple ID account and password.
Step 3. After you sign in, click the "Export iCloud data to computer with one click" option.
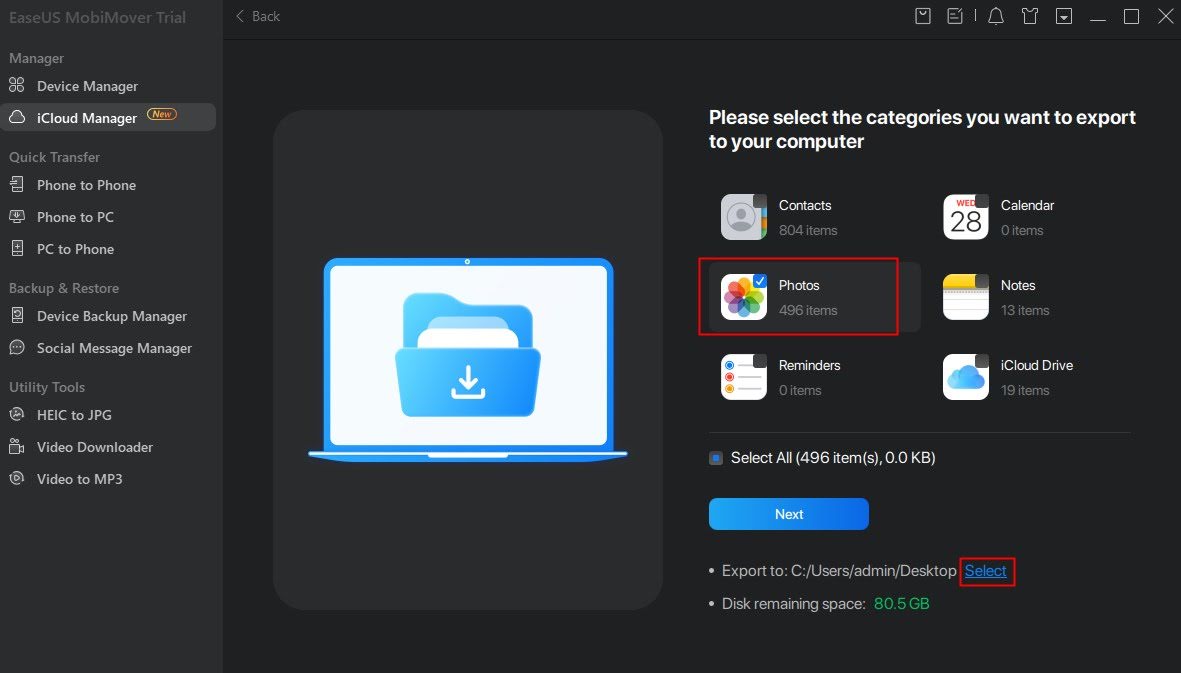
Step 4. Select the data type "Photos" and tap "Next." (You can change the destination to save the files.)
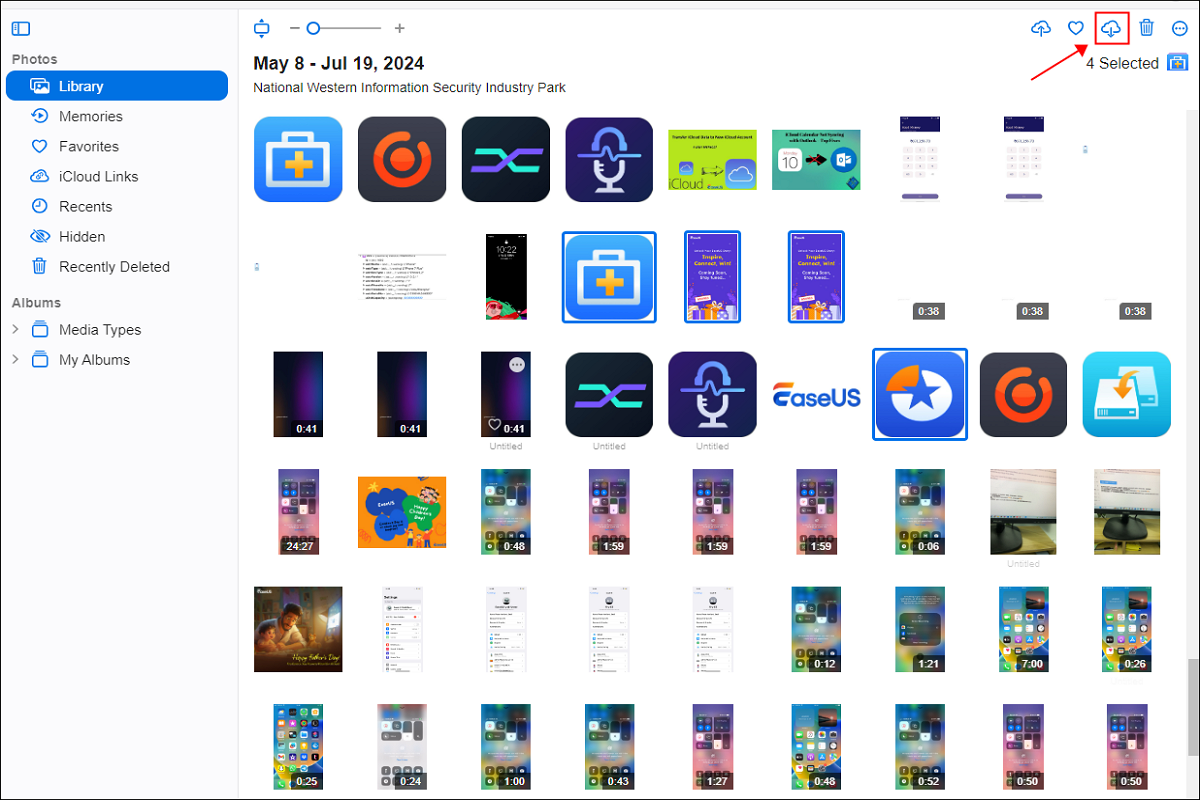
Then, MobiMover will initiate the transfer procedure right away. Be patient till it's done. After it finishes, you can view the transferred files and transfer more.
How to Transfer iCloud Photos to an External Hard Drive via iCloud Website
Compatibility: Windows and Mac
Best for: Download no more than one thousand photos at a time
The iCloud website allows users to browse and download photos to a computer. With the iCloud website, you can easily download photos to your computer. iCloud is also a common way to transfer photos from iCloud to an external hard drive. If you have uploaded iPhone photos to iCloud, you can also transfer photos from iPhone to a flash drive, SSD, or HDD. Please ensure a stable internet connection to facilitate smooth downloading. The following steps explain transferring pictures from iCloud to an external hard drive.
Step 1. Connect the external hard drive to your computer with a USB cable. Ensure it's properly formatted and has enough space to store your iCloud photos.
Step 2. Open a web browser on your computer and visit iCloud.com. Sign in with your Apple ID and password.
Step 3. On the iCloud homepage, click "Photos" to access your iCloud Photo Library.
Step 4. Select the photos you want to transfer.
Step 5. After selecting the photos, click the Download button at the top-right corner of the screen.
Step 6. Open File Explorer (Windows) or Finder (Mac) to find the Downloads folder.
Step 7. Copy the transferred photos and paste them to the external hard drive.
Tips: To select all iCloud photos, use the keyboard shortcut "Control + A" on Windows or "Command + A" on Mac. iCloud allows you to download up to 1,000 photos at a time. Depending on the number of photos, this process can be time-consuming.
How to Transfer Photos from iCloud to Hard Drive Using iCloud for Windows App
Compatibility: Only supports Windows
Best for: Download all iCloud photos on a Windows PC
With iCloud for Windows, you can easily sync and access your data in iCloud. Accessing your photos and other important files on your Windows PC is convenient. Before using this method, please download your PC's iCloud for Windows app. Note that syncing through iCloud for Windows may be slow, especially with a large photo library.
With the iCloud for Windows app, you can transfer photos from iCloud to an external hard drive. You also need to transfer data with a USB cable.
Step 1. Open the iCloud for Windows App on your PC and log in with your iCloud account.
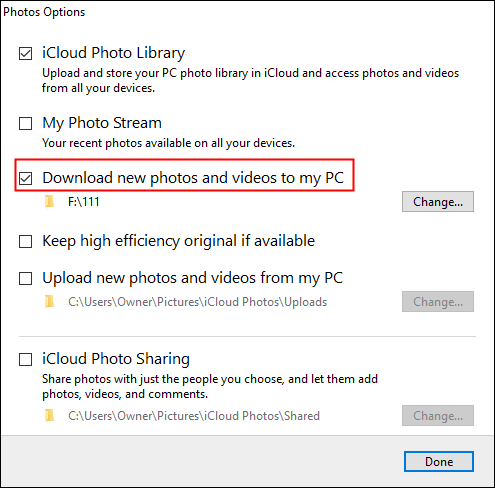
Step 2. In the iCloud app, Click "Photos" and click "Options" next to Photos. Ensure that iCloud Photo Library is enabled.
Step 3. Select "Download new photos and videos to my PC."
Step 4. Plug your external hard drive into the PC. Ensure that Windows properly recognizes it.
Step 5. Go to the folder where iCloud photos are downloaded on your PC. (It is usually C:\Users\[Your Username]\Pictures\iCloud Photos\Downloads.)
Step 6. Select the photos you want to transfer and paste them onto your external hard drive.
How to Transfer Photos from iCloud to External Hard Drive Through Photos App
Compatibility: Only supports macOS
Best for: Manage large photo libraries on Mac
The Photos app on Mac helps you view, edit, and share photos across all your Apple devices. It is a built-in app for macOS devices. You can also use the Photos app to transfer your iCloud photos from a Mac to an external hard drive, like an SSD. This method is particularly effective for Mac users who prefer a seamless way to manage photos across devices.
Step 1. Connect the hard drive with your Mac using a USB cable.
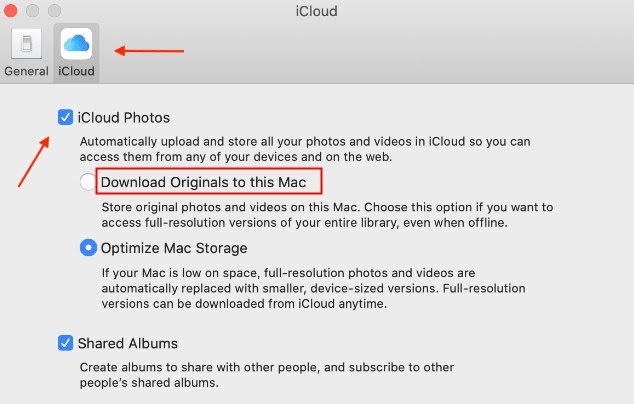
Step 2. Open the Photos app on your Mac, and select the photos you want to transfer. (You can go to "Photos" > "Preferences" > "iCloud." Select "Download Originals to this Mac.")
Step 3. Click "Export" in the File menu. Select your hard drive as the destination.
Step 4. Click the "Save" button to transfer the photos.
Bonus: How to Speed Up Photo Transfer from iCloud to External Hard Drive
Sometimes, Transferring iCloud photos to a hard drive takes a long time. This involves several factors, like your device's condition, Internet or USB connection, and the method you use. If the transfer process is slow, here are some tips for accelerating photo transfer from iCloud to an external hard drive.
- USB cable Connection: Ensure the external drive and your computer support USB 3.0 or Thunderbolt. USB 3.0 and above and Thunderbolt interfaces provide faster data transfer speeds.
- External Hard Drive: Consider using a fast external hard drive, like an external Solid-State Drive (SSD). SSDs generally offer much faster read and write speeds than HDDs.
- Internet Connection: Switch to a fast and switch Internet if you use Wi-Fi to transfer. You can also use a wired connection to download photos.
- Storage Space: Ensure your external hard drive has enough free space to save the photos.
- Transfer Method: Use dedicated photo transfer software to manage the downloads and transfers efficiently. EaseUS MobiMover, mentioned above, can help you a lot.
The Bottom Line
You may run out of free iCloud space. Then, you need to offload some photos to an external drive, like an SSD or HDD. This guide has explored four ways to transfer photos from iCloud to an external hard drive. EaseUS MobiMover and the iCloud website are suitable for both Windows and Mac users. EaseUS MobiMover is a good option for managing and personalizing photo transfers. Choose a method that suits your needs, like the iCloud for Windows app or Mac Photos app. Transferring iCloud photos to a hard drive is quite easy.
FAQs
1. How do I connect an external hard drive to my computer?
You need a USB cable. (USB 3.0 is recommended for faster data transfer speeds.)
Step 1. Plug one end of the USB cable into the USB port of your computer.
Step 2. Plug the other end into the USB port of the external hard drive.
Step 3. Wait for your computer to detect the external hard drive.
Make sure the external hard drive is rightly connected to your computer. If the drive doesn't show up, you can restart the process. You can also refresh the File Explorer (Windows) or Finder (Mac).
2. Where is the External Hard Drive located on the computer?
For Windows: You can find the external hard drive in File Explorer under "This PC" or "My Computer."
For macOS: You can find it on the desktop or in the Finder sidebar under the "Devices" section on the left-hand sidebar.